Pages

Search This Blog

Monday, May 28, 2012

Soft Toy Ball pattern

When each of my grandchildren reach their first birthday I give them a pair of soft toys, a small ball and a slightly larger ball.  The pattern  piece looks like this:


You will need 12 pieces for each ball, preferably lots of different colors and prints. There is no "grain line" on the pattern because only one side could be "on grain", so cut at will!

You can  click here for pattern to download a pdf

On the wrong side of each piece mark a small dot at the corners of the seam lines.  To do this you will need to poke a small hole in the pattern paper; I use the tip of my seam ripper. The hole must be large enough to fit a pencil tip through, but not so large as to be inaccurate!
Most of the time a regular pencil is all you need.


Some cloth needs a colored pencil to make visible dots


When you sew the pieces together, begin at a dot and stop at a dot. DO NOT stitch from edge of cloth to edge of cloth.
EXACT seams required, and these thread tails must be tied to secure the seam.

Sew, beginning at the previous seam, towards the next dot.
Five pieces sewn to the five sides of the baseball print cloth
Next sew the sides of those 5 pieces to their neighbor
Two halves of a ball
I made the second half to mirror the first one, so that when I sew them together I can make sure that none of the prints are sewn to a matching piece. I am also making another ball with matching pieces paired up.
Pairs sewn together

Can not piece this one as "2 half balls"; this is step 1.
Sewing 2 halves together, every corner is formed by 3 pieces. All seams must meet exactly but not cross.
This side up is difficult to match, the seam must begin exactly where the red and blue seam ends. See above photo.
Sew all the seams but 1, turn right side out and stuff.

Sew the last seam by hand (yes, I am left-handed!)
I should add... press all the seams open as you sew. A seam roll is a "must have"!

Roll up a towel to use for a seam roll if you don't have one.
Largest ball, do not over-stuff or it becomes too hard for little hands to grasp.
Plan for the medium sized ball.

All 4 balls and their patterns... ready well ahead of schedule for July and August birthdays!

Saturday, May 19, 2012

Pilgrim League Quilt, step 3, quilting & ties

To view the first step, the beginning of the quilt,  click here.

a note on terms......
"quilting" is the stitching that secures a "pieced" top layer to the batting and backing.  So you see.... the top is now "pieced" and the "quilting" can be started. The "top" and inner batting and back all must be perfectly flat and smooth in order to quilt them together nicely. The following procedure is not the most highly recommended one, but it worked for me!
.......edited to add...I don't do this any more! There is a better way! watch this video of...Sharon Schamber's method ...no stress to the knees and hips!

But this is what I did for this quilt...

1. move all the furniture out of the breakfast nook
2. sweep floor (OK, hit the sticky spot with sponge too)
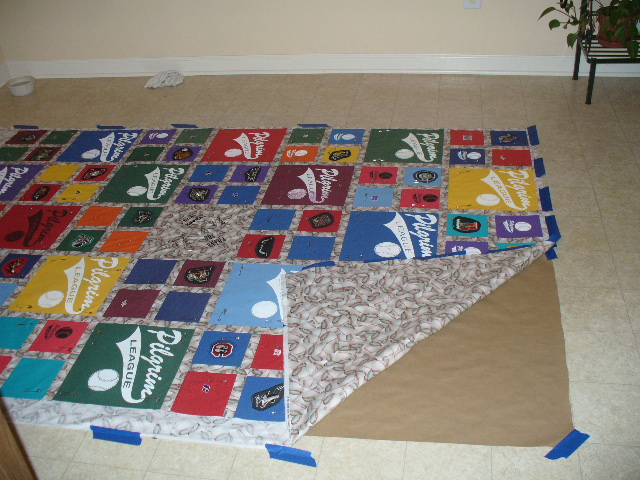
3. get the craft paper & painter's tape to protect Back cloth from floor, and protect floor from pins; cover  enough area of floor to be just a little smaller than the back cloth.

4. lay the Back cloth, right side down, over the craft paper, smooth out and tape securely.
5. lay the top over the Back cloth (batting not used due to weight), smooth out and secure with pins.
6. pin baste every block at least once, more if possible

Top layer secured to the back with large safety pins
Removing tape, see the craft paper under the cloth.
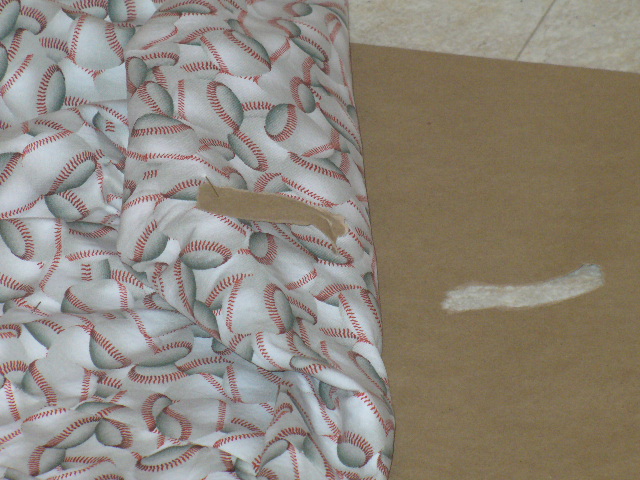
Some of the pins did go through the paper, floor undamaged!
Now that the two layers are secured with (a million!) pins, they can be quilted together with a minimum of shifting (in theory).... but some shift always happens. {edited to add...GET A WALKING FOOT! much less shift happens...maybe even no shift!!}
There are NO photos of me wrestling this thing through my sewing machine, but believe me, it is work!
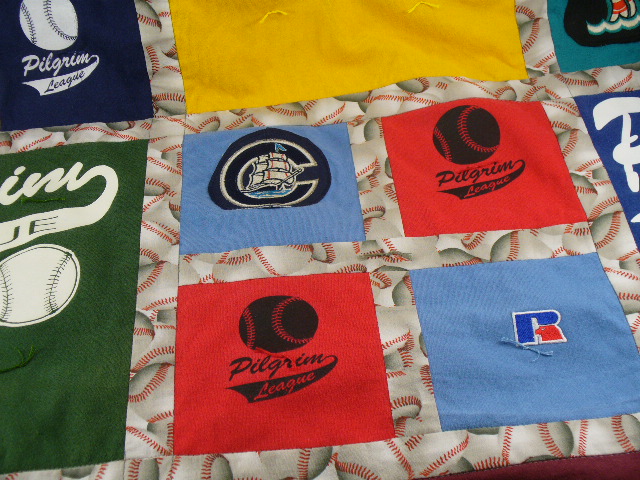
12 inch squares are too large to leave loose!

close up of tie in center of the block
 At this point I showed the quilt to my friend, Sharon, the  professional quilter. She reminded me that once in 12 inches is still not enough!  So I added more ties to every possible block!
4 more ties in every large block

Ties in small blocks, but not in hat logo blocks!


All the colors of floss used to tie the quilt

These ties along the top edge would have stitched through the hanging sleeve(already completed!).
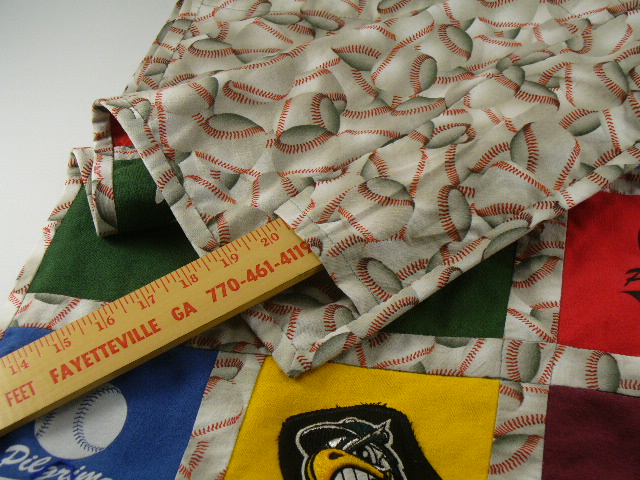
Yard stick to the rescue! Inserted in the sleeve, no ties sewn too far through.
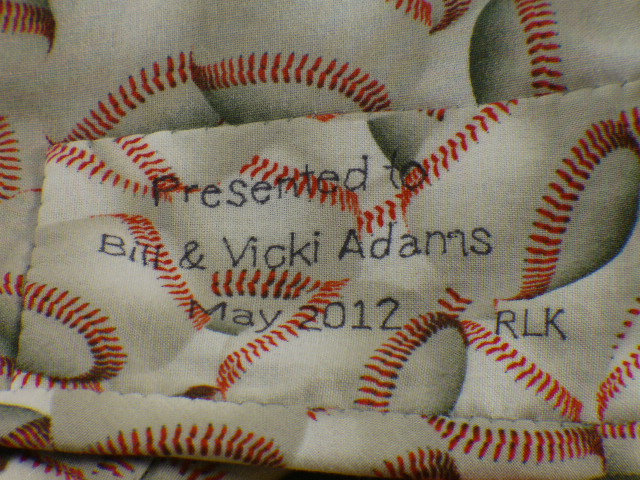
for historical purposes, a tag on the back
Bill & Vicki just before the presentation

Presenting the quilt after the last game of this season

Pilgrim League Quilt, step 2, piecing the top

If you missed step 1, click here to see the beginning.

Now that lots of cutting and a little piecing has been done, let's look at some layout ideas.

Squares laid out on a sheet over a double bed
OK, guess I only took one photo while re-arranging squares!
And it was a good thing I put the sheet down first, because I had roll the whole thing up and and put it away for a few days.
Row by row... sew the sash between blocks....
2 of the 35 blocks 
When the row is complete, add sash to the top edge.
When all the rows are complete and sewn together into one big rectangle....
get ready to quilt.
Next step click here to continue.

The Pilgrim League T-shirt Quilt, step 1, planning

Many years ago.....
some one noticed that our church had enough kids to have our very own Little League baseball league. I will be rather vague about the details 'cause I don't remember everything, and wasn't on the "planning committee". Not a lot of pressure to perform, not a lot of extra practice time, not a lot of games every night of the week; just an opportunity to learn a team  sport on Saturday morning. The teams have the entire range of ages (7 to 12 I think!) and they work together, the older ones teaching the younger ones.
So.... in the early spring, when sign-ups are announced, the kids are excited.... "who's team will I be on this year? what color will our shirts be? how cool will our hats be?..."
So this year someone gave me the idea..... OK... it was my daughter who first said it might be possible to do this! She had been given a few extra T-shirts from past years, and realized it might be enough to make a T-shirt quilt to give to our "Commissioners" as a Thank you for all the years they have worked to keep Pilgrim Baseball going!
Several families donated hats and shirts in order to make this work! Some of the kids love their shirts so much, they were not ready to give them up yet.

Since the "coolest" part of their team uniform was their hats, I wanted to find a way to make them part of this special quilt.... so I started de-constructing one to figure out if I could get the LOGO into a form that could be sewn into a quilt.....
I thought I might need every bit of cloth below the logo, so I did not cut the bill off, I removed the stitches, then cut the logo free from the rest of the hat.
When you look at the inside of this one, notice that the logo is embroidered in the hat cloth and NOT the stabilizer material.

These were embroidered THROUGH the stabilizer! A BEAR to remove!
Most of the stabilizer removed easily

Vent eyelets were stitched through the stabilizer, pull it apart thread by thread.
A few of the hat scraps!
A total of 27 hats were taken apart and the logos re-appliqued to T-shirt squares (photo comes later).

Shirt logos came in 2 basic sizes... 
Small logo beside button placket, 6 inch max.
Large logo below button placket, 12 inch square
 (sleeve logos in background will make 6 inch squares)
I wanted something special, just the right cloth, to pull all these colors and different size squares together... and I found it!


What better cloth for a baseball league quilt!

So.... let's cut some squares.....


Button placket being taken apart to get enough cloth for a 6 inch square!

Iron on t-shirt interfacing to keep the knit cloth from stretching too much.
Two hat logos & two color squares to form a large square

Printed baseball cloth cut in 2 inch strips for sash (between squares)

LOTS of sashing cut up!

Two small squares and sash (wrong side)
Right side up
Both vertical sashes sewn first, then horizontal sash to join them. 
The knit cloth "behaves" better if the sash is on top when sewn.
Next time.... layout of all those squares! click here to continue to step 2.