Charley's choice of colors for his quilt are red and black; squares please! So this request sent my mind to the checker board idea. Peek at his quilt
here. Since the center portion of his quilt IS an actual checker "board" he will want some checkers to go with the quilt.
My favorite part of playing checkers is when my piece travels all the way across the board and is "upgraded" to "King" status, thus gaining new power to move backwards! "KING me!" I would crow to my sister! These cloth checkers have a gold "crown" on one side so they can be flipped over to reveal their KING status.
I know that my daughter will be tempted to ..... (insert favorite punishment) if I give Charley all these loose checkers... (12 of each color plus 2 spares of each color for a total of 28!) so I made a bag!
 |
| Use a safety pin to thread the ribbon into the casing. |
 |
| Black bead for red ribbon, red bead for black ribbon. |
 |
| Place bead on ribbon, then tie square knot. |
 |
| Move the bead over the knot. |
At this point I should explain that my ribbon was almost too wide to be able to fit the knot into the bead. I put the loose end of the ribbon into the bead and pulled..... and pulled.... opps, now the bead is on the other side of the knot.... pull again from the other side.... opps again! As you can see, I did finally get the bead to cover the knot.
 |
| Cut the other end of the ribbon, but not too short! |
 |
| Bring the ribbon ends together and tie an over hand knot. |
 |
| Tic-Tac-Toe any one? |
I will insert black ribbon through the casing on the opposite side of the bag and add the red bead in the same way. (after I buy the black ribbon!)
 |
Your move.....
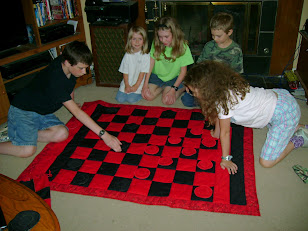
edited to add this photo of Charley sharing his quilt:
Charley and 'Becca playing a game of checkers! |


No comments:
Post a Comment