Pages

Search This Blog

Saturday, October 26, 2013

Blue and White Chevron Quilt, part two

To read about the beginnings of this quilt click here.

When my granddaughter saw a photo of just the pieced top, unquilted, said she would really like to have it for her birthday gift this year.
No borders yet.

Blue "crackle" print for the back.

I had originally intended to free motion quilt circles and meanders on each chevron...but I also wanted to be sure there was quilting near to each peak and valley of the chevron.
Intentionally not quite "in the ditch" stitching along the edges of each chevron.
I wanted to use a variegated blue thread and wanted it to show up.
Once all the zig and zag lines were sewn...I did a sample free motion test with my favorite machine for that.
"Daisy Mae" did a wonderful job on K-A's quilt (on left)...but her speed controller has developed some hesitation.
I need dependable control, so she needs a trip to the fix-it man!
My sewing machine repair man was on vacation...and I did not want to wait a week or more to finish the quilt...and the chevrons are only 2 inches wide so what I have done is "enough" ...so I went ahead with the binding.
 I cut several 2.25 inch bias strips of the same cloth as the borders, sew the strips end to end until I have enough to go around the quilt. Fold the bias strip in half, length-wise and sew on the top side of the quilt, matching raw edges (do not trim the excess back & batting edges yet).

When the bias binding  is sewn all the way around, then the extra edges are trimmed off to look like this.

Now the folded edge of the binding is folded to the back of the quilt and hand stitched with a ladder stitch.


Hand closing the binding on the back...yes I need reading glasses to sew tiny stitches, and an extra light helps too!
Yes, I am left-handed, so this photo might look odd; I sew from left to right.

I made the label by tracing over text printed off my computer.

All washed and ready to gift wrap!

Wednesday, September 25, 2013

Biscuits

Now just remember that I am not a Food Blogger...
I just want to share an experience from my kitchen...

A friend makes these yummy biscuits called "Three Two One"
3 packs of Bisquick Complete
2 eggs
1 cup milk

Stir just enough to moisten all the dry mix.
I like to use parchment paper and a scoop.

My scoop didn't like the sticky dough, but the damage isn't permanent.

Second batch waiting for their turn on the cookie sheet. This is one reason I use parchment paper!
First batch is done after 7 minutes in the oven at 425 degrees (F).

All done, waiting to be transferred to the bread basket.
Yummy!
Here is the quick text version:

3 packs Bisquick Complete mix
2 eggs
1 cup milk

oven 425 deg

mix just until moistened, drop by scoop or spoon onto parchment lined cookie sheet
bake 7 to 10 minutes.

Tuesday, July 16, 2013

Blue and White Chevron Quilt part 1

Remember these squares?... left over from the Red White and Blue quilt...
I set aside the red and the dots, and used the blue stripe and the blue floral.
This is going to be another Half Square Triangle - chevron quilt, but with smaller starting squares.
The 7.75 inch squares are cut into fourths.

Floral print marked on the back for HST seams, paired up with a stripe.
Stripes made it a little more complex...
I need "Right handed" and "Left handed blocks!
 Let me introduce "Molly Majestic"...my wonderful, direct drive, sewing machine. Probably made in the 1920's, a little fixing up...and now she runs like a charm!
To insure the proper number of each block. I stacked the stripe blocks alternating.
Glad I discovered chain piecing!
I leave the chain connected and sew the second seam of the HST, then cut it all apart.

Close up of "Molly"  stitching the first side.
Ready for the next step...
Clip the threads and cut on the pencil line.
Press the seams towards the darker cloth. (note - this lead to bumps later; so you must choose between shadows behind the white cloth in some places or bumps!)
This is why I need right and left handed blocks...
I want the stripes to behave like this!
All the half square triangle blocks have been sewn.

Close up of the different white prints I added to the mix.
Now to begin piecing it all together!

Sew pairs of Half Square Triangle blocks together then
sew pairs of pairs.

Eventually they are all connected like this...
then press your seams.
Here are 4 rows of blocks laid out in chevron pattern.
Several chevrons completed, next row lined up.

Flip the row along its long edge so right sides (face of fabric) are together.
I line up the row so I can see the chevron and make sure I sew the proper edges together!

Or you could line up pairs of rows...

...then sew the pairs of rows together.
Once you get started...it comes together fairly easily!
Quilting will have to wait for another day....
(edited to add...it has been quilted, see it  here. )

Saturday, July 6, 2013

Red, White, and Blue Chevron Quilt

I make things for The Ships Project...visit their web page http://www.theshipsproject.com/
Knit hats for the winter and Cool ties (neck-coolers) for summer, and occasionally a quilt. I call this one the Deer Quilt.

This one was a special request,

See the deer and other wild life!

Sometimes I just make one from what I have on hand, or what is donated. My friend, Susan, an experienced Quilter, gave me some squares of cloth she no longer wanted to keep.
These are some of the left over squares!
The original pile was probably enough to make 2 or 3 Twin Quilts.
Susan also introduced me to the concept of "half square triangles".  So I used her squares and tried out her technique and made this quilt.
A view of the whole quilt
Another friend, Sharon, is a professional long arm quilter.  She donated her quilting services for soldier care quilts.
Close up of one of the stars

Close up of the border detail

Corner detail
Even the back is interesting!

Sharon "fusses" at me if I do not put a label on my quilt!
I have started another quilt using Susan's squares and some white on white prints...taking photos as I sew this time!

Wednesday, March 20, 2013

Strap or tie tutorial

I have been making several aprons and tote bags lately....

so here is one of my favorite ways to make matching ties for aprons or handles for bags...

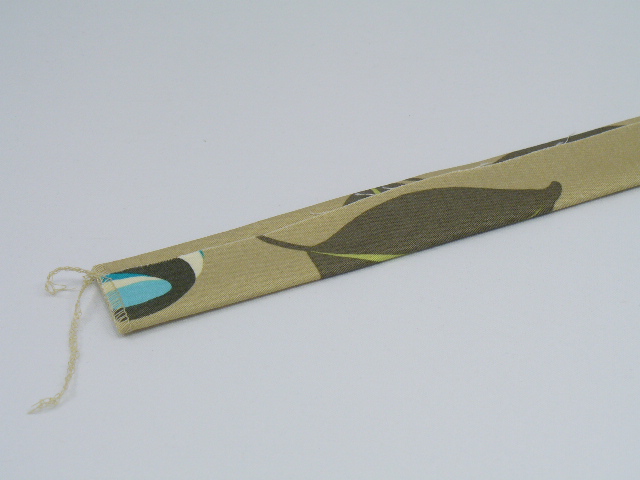
Cut a long piece of your cloth... 3 inches to 5 inches wide. Exact width does not matter with this technique.

Fold in half along the long edge and press a crease.
Open to expose the inside, then fold one edge toward the center, not quite touching the crease. PRESS only the edge.

Re-fold the center crease; raw edge is now inside.

Fold the other raw edge over the strap snugly against the folded edge inside the strap. PRESS.
Open the folds and tuck both raw edges inside. PRESS.

Ready to stitch, from the back side I can see both edges.
How to finish the short ends depends on how they will be used.  If the strap is to be sewn into a seam, the ends will not be seen and need no special treatment. Tie ends need some finishing touches.
These ends could be sewn into a bag.
Here I opened the folds and stitched a small seam in one end of the tie.

Re-folded the pressed creases.
One end with a seam, one end serged.
Finished apron