Several years ago... actually... decades ago... I was given a pair of crochet pot holders by my cousin.
They are made of acrylic yarn so I was a little tentative about using them for very hot oven items, thinking they might melt. They have worked well as micro-wave helpers! I inspected their construction and made up a pattern and use cotton yarn for these pot holders.
I am left-handed and taught myself to crochet from a right-handed book so I am showing you my work. It will look backwards to a right handed crocheter...Lefties deal with this all the time!
My daughter, Faith, also crochets right handed... see her chevron afghan
here.
This is not a How to Crochet for beginners tutorial, I assume you know how to chain and single crochet.
You can find beginner lessons at
Lion brand yarn or
Red Heart yarn or look for a book at your library!
 |
| Cotton yarn, hook size I; chain 37 |
|
 |
| In 2nd chain from hook work sc; repeat to end of chain. |
 |
| sc to end of chain...note green tail yarn. |
|
 |
| 3 sc in end of chain (actually the beginning) |
|
 |
| sc in each chain (down the other side of the chain) |
|
 |
| At end of row do not turn work, add 1 sc in end sc and continue around. |
|
 |
| continue around the end of the chain |
 |
| Do not add sc when at the ends from here on. |
|
 |
| Viewed from the wrong side you can see how it curves in. |
|
 |
| Right side of the work...continue sc around. |
|
 |
| As you add rounds it grows like this. |
 |
| At this point you could re-fold and decide to make a bag instead of a pot holder! |
 |
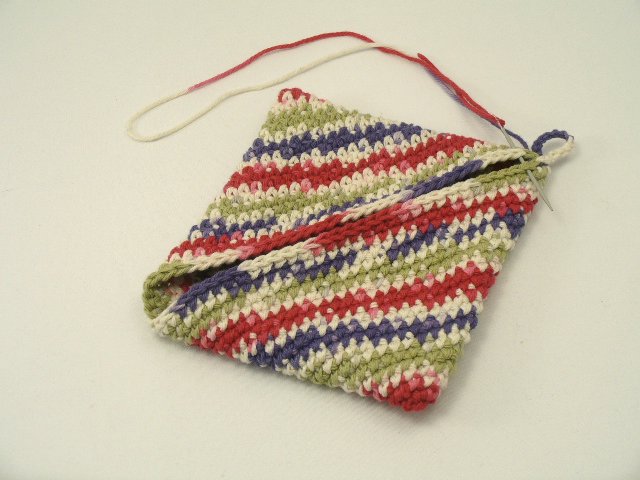
| When the edges of your pot holder touch like this it is time to finish off. |
 |
| Align the outer edge folds so that it is square, slip st in 1 sc at corner. |
 |
| Chain 12 pulling each loop closed. |
 |
| Cut yarn leaving a tail about 3 times as long as the seam (this is plenty!) |
 |
| Using a yarn needle take 1 stitch at the base of the tight chain. |
 |
| Secure the tight chain for a hanging loop. |
Sew the pot holder's seam closed. I prefer to use a ladder stitch, sewing through the loops of each sc.
 |
| Seam finished, all but the knot. |
 |
| Knot in the last stitch (sorry it is blurry!) |
|
 |
Bury the tail,
needle into the work at knot staying between layers, out again over there. |
 |
| Tail yarn ready to be snipped off |
 |
| Once cut the tail disappears |
 |
| Clean corner, no tail |
 |
| Finished pot holder |
Text only version available
here.


Hooray! Lovely pot holders. Thank you for my new set, we already used them for supper tonight.
ReplyDelete